
Updating Your Framer Site for Markets & Shopify's New Cart API
To ensure your store continues working properly, please complete these three steps before April 1, 2025.
If you are still using v1 and haven't moved to the plugin yet, you will need to do so before April 1, 2025.
These updates were released on Thurs Mar 13, 2025.

We just released a major update for our plugin users that includes two critical features:
New Shopify Storefront Cart API
Ensures your store works smoothly with Shopify's latest APIs.
Markets Support
Allows your customers to shop in their local country/currency.
When the updates are released, please follow these 3 steps:
⚠️ Important: Updating your script and updating your components must both be completed before publishing — updating only one step could break your site's functionality. We strongly recommend publishing your site to staging first to test functionality.
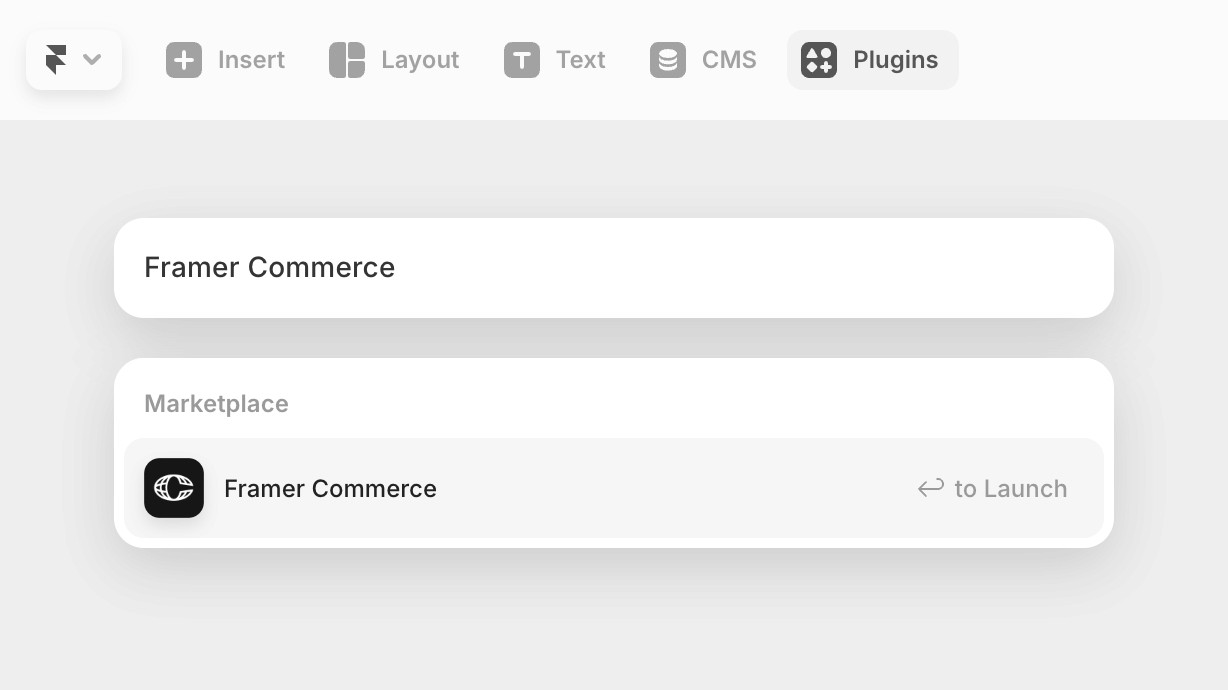
Step 1: Open the plugin
1
Open the Framer project you want to update
2
In the Framer navigation, click on "Plugins"
3
Search for "Framer Commerce" and open the plugin
4
If the updates are ready, you'll see a pop up telling you to update your components.
If you don't see it, the updates haven't been released yet.
5
The new script will automatically be updated in the head of your site
You should see a notification that reads "A Custom Code snippet from Framer Commerce has been updated."
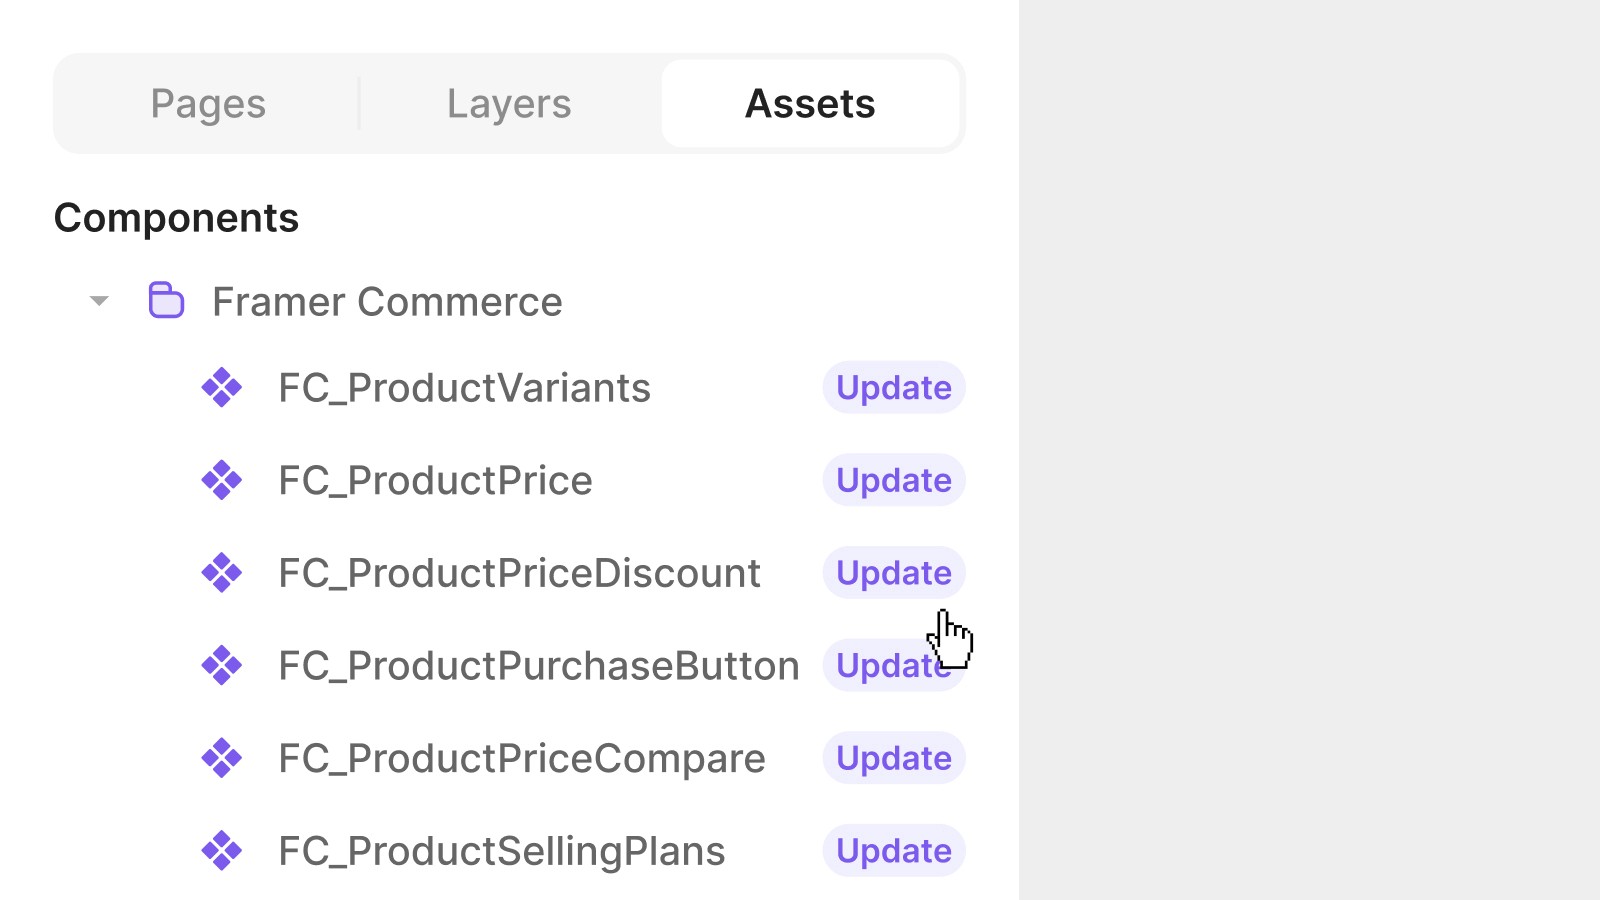
Step 2: Update all components
Your script is now updated, so it's crucial you update all of your Framer Commerce components to work with the new script.
1
Click on the "Assets" tab on your left panel in your Framer project
2
Under "Components", scroll down and expand the "Framer Commerce" folder
3
Click the purple "Update" text beside all components

Step 3: Publish
You're now ready to hit Publish on your site, however we suggest testing your site to make sure everything still functions as desired.
Turn on staging environment:
1
Click on the Settings icon on the top right of your Framer file
2
Click on "Staging & Domains" on the left side
3
Click "Enable Staging"
4
Click "Publish"
5
Click "Update" under your staging domain
6
Test your site's functionality on your staging domain in your browser
7
When you're ready to go live, Publish to Production
Click on Publish, then the "Production" tab, then "Deploy latest"
If you need assistance in this update or upgrading your v1 site to the plugin, please contact us.
